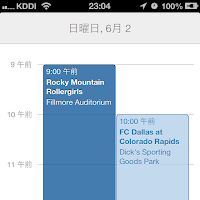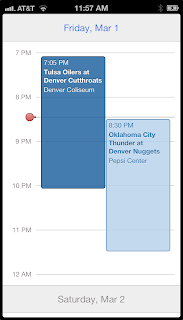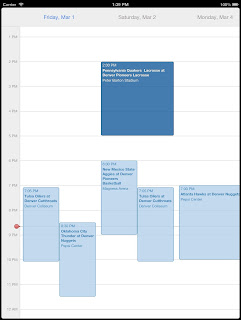
標準カレンダーアプリの日別表示のようなUIのライブラリを提供する「MSCollectionViewCalendarLayout」プロジェクトを動かしてみた。
UICollectionViewLayoutのサブクラスを利用しており、iOS6、ARCが必須条件となる。またライセンスはMITライセンスで配布されている。
ソースコードは以下のgithubにて提供されている。
https://github.com/monospacecollective/MSCollectionViewCalendarLayout
ソースコードをダウンロードすると「MSCollectionViewCalendarLayout-master」というフォルダができる。
このソースのなかにあるExampleフォルダのExample.xcodeprojがサンプルプロジェクトとなるが、このままプロジェクトを起動しても、RestKitが見つからないのでエラーとなる。

これを解決するためには、CocoaPodsをインストールして、RestKit, Cupertino Yankee, UIColorユーティリティが必要となる。
以下の内容で進めていく。
- 1. CocoaPodsインストール
- 2. pod セットアップ
- 3. pod インストール
- 4. プロジェクトの実行
1. CocoaPodsインストール
ターミナルを開いて、CocoaPodsをインストールする。インストールにはMac標準のgemを利用する。
$ gem install cocoapods
ERROR:  While executing gem ... (Gem::FilePermissionError)
    You don't have write permissions into the /Library/Ruby/Gems/1.8 directory.
上記を実行したらエラーが出てしまった。ディレクトリへの権限がないということなので、sudoコマンドに実行し直す。
$ sudo gem install cocoapods
Building native extensions.  This could take a while...
Building native extensions.  This could take a while...
Successfully installed i18n-0.6.1
Successfully installed multi_json-1.7.1
Successfully installed activesupport-3.2.13
Successfully installed colored-1.2
Successfully installed xcodeproj-0.5.2
Successfully installed multipart-post-1.2.0
Successfully installed faraday-0.8.6
Successfully installed addressable-2.3.3
Successfully installed faraday_middleware-0.9.0
Successfully installed hashie-1.2.0
Successfully installed netrc-0.7.7
Successfully installed octokit-1.23.0
Successfully installed escape-0.0.4
Successfully installed json-1.7.7
Successfully installed open4-1.3.0
Successfully installed rake-10.0.3
Successfully installed cocoapods-0.16.4
17 gems installed
Installing ri documentation for i18n-0.6.1...
Installing ri documentation for multi_json-1.7.1...
Installing ri documentation for activesupport-3.2.13...
これでcocoapodsのインストールは完了
2. pod セットアップ
続いてpodのセットアップを行う。
$ pod setup
Your RubyGems version (1.3.6) is too old, please update with: `gem update --system`

$ gem update --system
...
gemのバージョンが古いと怒られたので、gemのバージョンアップを実行。その上で再度podのセットアップを行う。
$ pod setup
3. pod インストール
最後にExampleフォルダへ移動して、podのインストールを行う。結構、時間がかかる。
$ cd MSCollectionViewCalendarLayout-master/
$ pod install
Resolving dependencies of `./Podfile'
Updating spec repositories

Cocoapods 0.17.0.rc5 is available.
.....
Generating support files

[!] From now on use `Example.xcworkspace'.
4. プロジェクトの実行
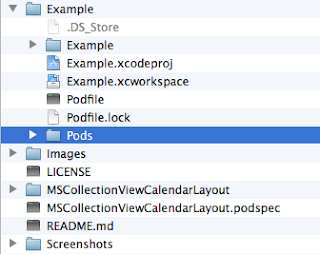
podのインストールが完了したら、以下のようにExampleフォルダにPodsフォルダが作成される。
これでサンプルプロジェクトが実行可能となる。

Example.xcworkspaceをダブルクリックしてXcodeを起動したら、Exampleプロジェクトの実行するとサンプルの動作を確認できる。


iPhone、iPadで表示が異なり、iPhoneの場合は縦スクロール、iPadの場合は横スクロールとなる。
0 件のコメント:
コメントを投稿